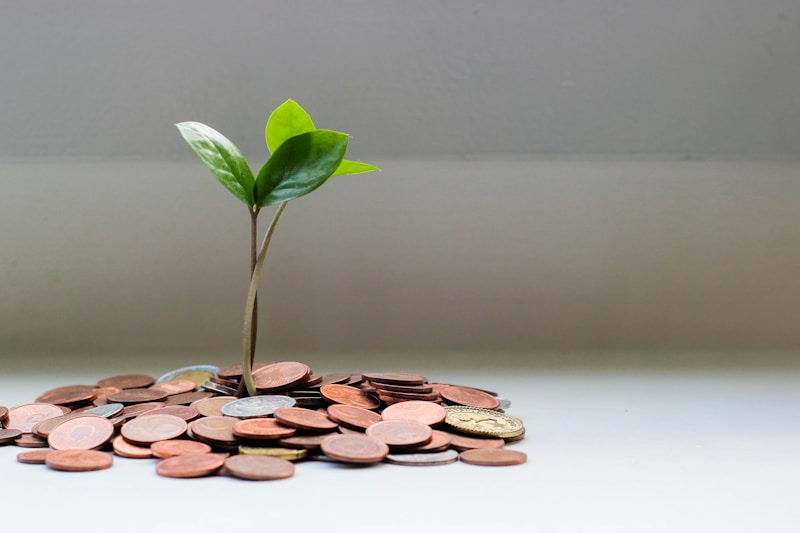
If you’ve ever wondered how to automate savings monthly, you’re not alone. Most people know they should save more money, but when life gets busy, manually transferring funds to savings accounts becomes the first thing that falls through the cracks. The good news? Learning how to automate savings monthly can completely transform your financial life without requiring willpower or constant reminders. In this comprehensive guide, you’ll discover seven proven steps that will help you build wealth automatically, starting with as little as $50 per month.
Automating your savings isn’t just a convenience—it’s a financial strategy that successful savers swear by. When you automate savings monthly, you remove the psychological barriers that prevent most people from building wealth. You’re essentially paying yourself first before you have the chance to spend that money elsewhere. By the end of this article, you’ll have a complete roadmap to set up automatic savings that work for your budget, lifestyle, and financial goals.

Table of Contents
- Why Learning How to Automate Savings Monthly Changes Everything
- Step 1: Calculate How Much You Can Realistically Save Each Month
- Step 2: Choose the Right Savings Accounts for Automation
- Step 3: Set Up Automatic Transfers Through Your Bank
- Step 4: Time Your Automated Savings With Your Paycheck
- Step 5: Create Multiple Automated Savings for Different Goals
- Step 6: Gradually Increase Your Automated Monthly Savings
- Step 7: Monitor and Adjust Your Automated Savings Strategy
- Frequently Asked Questions About How to Automate Savings Monthly
- Conclusion: Start Automating Your Savings Today
Why Learning How to Automate Savings Monthly Changes Everything
Before diving into the specific steps of how to automate savings monthly, let’s talk about why this strategy works so incredibly well. The average American who manually saves money puts away about $175 per month when they remember to do it. However, those who automate savings monthly consistently save an average of $312 per month—that’s nearly 80% more money building up in their accounts!
The psychology behind automated savings is simple but powerful. When you have to manually transfer money to savings, you’re making an active decision to give up immediate gratification. Your brain sees that $200 sitting in your checking account and thinks of all the things you could buy right now. But when you automate savings monthly, the money disappears before you can spend it. You literally never see it in your spending account, so you don’t miss it.
The Real Cost of Not Automating Your Savings
Let’s look at concrete numbers. Imagine you intend to save $250 each month but rely on manually transferring the money. Realistically, you might remember to do this 7 out of 12 months. That’s $1,750 saved per year. Now compare that to someone who learned how to automate savings monthly and sets up a $250 automatic transfer. They save the full $3,000 every single year without thinking about it.
Over ten years, the manual saver has put away $17,500 (assuming the same inconsistent pattern). The automated saver? A full $30,000, plus compound interest. If that money is in a high-yield savings account earning 4.00% annual interest (as of 2026), the automated saver actually has around $36,600 while the manual saver has only about $21,100. That’s a difference of nearly $15,500—all because of automation.
Automation Removes Willpower From The Equation
Research shows that willpower is a limited resource. Every financial decision you make throughout the day drains your mental energy. Should you buy that coffee? Skip lunch out? Transfer money to savings? By learning how to automate savings monthly, you eliminate one of these decisions entirely. The transfer happens automatically, whether you’re having a great financial month or a tough one.
When you connect automated savings with budgeting for beginners, you create a comprehensive financial system that works on autopilot. This combination ensures you’re not just saving money—you’re building a complete financial foundation that requires minimal ongoing effort.
Step 1: Calculate How Much You Can Realistically Save Each Month
The first crucial step in understanding how to automate savings monthly is determining exactly how much you can afford to save. This isn’t about wishful thinking—it’s about running real numbers based on your actual income and expenses. Many people fail at automated savings because they set the amount too high and then have to constantly cancel or reduce transfers, which defeats the purpose.
The 50/30/20 Rule as Your Starting Point
A popular framework when figuring out how to automate savings monthly is the 50/30/20 budgeting rule. This suggests allocating 50% of your after-tax income to needs, 30% to wants, and 20% to savings and debt repayment. Let’s break this down with real numbers:
| Monthly Take-Home Pay | Needs (50%) | Wants (30%) | Savings/Debt (20%) |
|---|---|---|---|
| $2,500 | $1,250 | $750 | $500 |
| $3,500 | $1,750 | $1,050 | $700 |
| $5,000 | $2,500 | $1,500 | $1,000 |
| $7,000 | $3,500 | $2,100 | $1,400 |
If you’re earning $3,500 per month after taxes and following the 50/30/20 rule, you’d aim to automate savings monthly at $700. However, if you have existing debt payments of $300 monthly, your automated savings would be $400 instead. This calculation gives you a realistic starting point for how to automate savings monthly based on your specific financial situation.
Start Small and Build Confidence
If the 20% number feels overwhelming, don’t let that stop you from learning how to automate savings monthly. Start with whatever feels comfortable—even if it’s just $50 or $100 per month. The most important thing is establishing the habit and the automatic system. You can always increase the amount later (we’ll cover this in Step 6).
Consider this progression: Maria started her automated savings journey with just $75 per month because that’s all she felt comfortable committing to. After three months, she realized she barely noticed the missing money, so she increased it to $150. Six months later, she bumped it up to $250. Now, two years into her journey of automated savings, she’s consistently putting away $400 monthly and has built up over $7,200 in her emergency fund.
The Paycheck-to-Paycheck Reality Check
What if you’re living paycheck to paycheck and can’t find any room in your budget? First, tracking your spending for one full month often reveals surprising opportunities. Most people discover they’re spending $100-300 monthly on subscriptions they rarely use, dining out they don’t remember, or small purchases that add up.
Second, when you’re learning how to automate savings monthly from a tight budget position, even $25 per month is a victory. That’s $300 per year—enough for minor emergencies that would otherwise go on a credit card. Check out strategies in this guide on how to save money to find extra dollars you can redirect toward automated savings.
Step 2: Choose the Right Savings Accounts for Automation
Once you’ve determined your savings amount, the next step in how to automate savings monthly involves selecting the right type of account. Not all savings accounts are created equal, and choosing the wrong one could cost you hundreds or even thousands of dollars in lost interest over time.
High-Yield Savings Accounts: Your Best Friend for Automated Savings
When you’re setting up how to automate savings monthly, a high-yield savings account (HYSA) should be your first choice. Unlike traditional savings accounts at big banks that pay 0.01% to 0.10% interest, high-yield savings accounts as of 2026 offer rates between 3.75% and 4.50% annual percentage yield (APY). Let’s see what this means in real dollars:
Suppose you automate savings monthly at $300 and maintain this for five years. With a traditional savings account at 0.05% interest, you’d have approximately $18,022. With a high-yield savings account at 4.00% interest, you’d have approximately $19,600. That’s an extra $1,578 just for choosing the right account type—and you didn’t have to do anything differently!
Popular high-yield savings account providers include Marcus by Goldman Sachs, Ally Bank, American Express Personal Savings, and CIT Bank. According to NerdWallet, these accounts typically have no monthly fees, no minimum balance requirements, and make it incredibly easy to automate savings monthly through their online platforms.
The Case for Multiple Savings Accounts
As you master how to automate savings monthly, you might consider opening multiple savings accounts for different purposes. Many online banks allow you to create sub-accounts or “savings buckets” within one main account. This strategy helps you mentally separate your emergency fund from your vacation fund from your car replacement fund.
Here’s how this might look in practice when you automate savings monthly:
- Emergency Fund Account: $300 automated monthly until you reach 3-6 months of expenses
- Vacation Fund Account: $150 automated monthly for your annual trip
- Car Replacement Account: $100 automated monthly so you can buy your next vehicle with cash
- Home Down Payment Account: $200 automated monthly toward homeownership
This multi-account approach, when combined with understanding how to automate savings monthly, creates a comprehensive savings system where every dollar has a specific purpose. You’ll never have to wonder if you can “afford” to take that vacation—you’ve been automatically saving for it every single month.
Money Market Accounts: A Hybrid Option
Money market accounts offer another option when you’re deciding how to automate savings monthly. These accounts typically pay interest rates similar to high-yield savings accounts but may offer check-writing privileges or debit cards. The Consumer Financial Protection Bureau notes that money market accounts often require higher minimum balances ($2,500-$10,000) compared to regular high-yield savings accounts.
For most people learning how to automate savings monthly, a high-yield savings account provides the perfect combination of accessibility, competitive interest rates, and simplicity. Save money market accounts for when you’ve built up substantial savings and want slightly more flexibility in accessing your funds.
Step 3: Set Up Automatic Transfers Through Your Bank
Now we get to the heart of how to automate savings monthly: actually setting up the automatic transfers. This process is surprisingly simple, yet this is where many people get stuck simply because they’re unsure of the mechanics. Let’s walk through exactly how to do this step by step.
Using Your Bank’s Online Bill Pay or Transfer System
Most banks offer several ways to automate savings monthly. The most common method is through their online banking portal or mobile app. Here’s the typical process:
- Log into your checking account’s online banking portal
- Navigate to “Transfers” or “Move Money” section
- Select “Schedule a Transfer” or “Recurring Transfer”
- Choose your checking account as the “From” account
- Select your savings account as the “To” account
- Enter the amount you want to automate savings monthly ($300, for example)
- Set the frequency to “Monthly” or “Every 4 weeks”
- Choose the specific day (we’ll discuss timing in Step 4)
- Review and confirm the recurring transfer
The entire process of setting up how to automate savings monthly takes about five minutes. Once it’s done, you’ll receive a confirmation, and the transfer will happen automatically every month without any further action required from you.
Setting Up Cross-Bank Automatic Transfers
What if your checking account is with one bank but you want to automate savings monthly into a high-yield savings account at a different bank? This is actually very common and still quite simple. You’ll typically set this up from the savings account side:
- Log into your high-yield savings account (the receiving account)
- Look for “Link External Account” or “Add Bank Account”
- Enter your checking account routing and account numbers
- Verify the account (usually through two small test deposits)
- Once verified, set up a recurring transfer or “automatic savings plan”
- Specify the amount and frequency to automate savings monthly
Most high-yield savings account providers make this process extremely user-friendly because they want to make it easy for you to automate savings monthly into their accounts. Banks like Ally, Marcus, and American Express have particularly smooth interfaces for setting up recurring transfers from external accounts.
The “Pull” vs. “Push” Method for Automated Savings
When you’re learning how to automate savings monthly, you’ll encounter two approaches: “push” transfers (sending money from your checking account) and “pull” transfers (having your savings account withdraw money from checking). Both work perfectly fine, but the “pull” method often gives you more control and better tracking features.
Many people who successfully automate savings monthly prefer the pull method because high-yield savings account interfaces tend to have better savings goal tracking, progress visualization, and management tools than traditional checking accounts. Plus, if you ever need to pause or adjust your automated savings, it’s often easier to do this from the savings account side.
Step 4: Time Your Automated Savings With Your Paycheck
The timing of your automatic transfers is absolutely critical to successfully automating savings monthly. Set up the transfer for the wrong day, and you risk overdraft fees or having to cancel the transfer because funds aren’t available. Get the timing right, and your automated savings will flow smoothly month after month without any issues.
The “Pay Yourself First” Philosophy
The golden rule of how to automate savings monthly is to schedule your transfer for one or two days after your paycheck deposits. This ensures the money is definitely in your account and implements the powerful “pay yourself first” principle. You’re treating your savings like a bill that must be paid before anything else.
Let’s say you get paid on the 1st and 15th of each month. Here’s how you might structure automated savings:
- Bi-weekly earners: Set up a $150 automatic transfer on the 3rd and 18th (one business day after payday). Total monthly automated savings: $300.
- Monthly earners: Set up a $300 automatic transfer on the 2nd of each month (the day after your paycheck on the 1st).
- Weekly earners: Set up a $75 automatic transfer every Friday if you’re paid on Thursdays. Total monthly automated savings: approximately $300-375 depending on the number of weeks.
This timing strategy for how to automate savings monthly ensures you never have to worry about whether you have enough money in your checking account. The funds are transferred immediately after your income arrives, before you have a chance to spend it on anything else.
Building in a Small Buffer
Even when you’re careful about timing, life happens. Your paycheck might deposit a day late, or you might have an automatic bill payment that hits your account on the same day. When setting up how to automate savings monthly, consider building in a small buffer.
For example, if your paycheck consistently deposits on the 1st, schedule your automatic savings transfer for the 3rd instead of the 2nd. This two-day buffer means that even if your paycheck is delayed by one business day, your automated savings transfer won’t cause any problems. The peace of mind is worth the tiny delay.
Special Considerations for Variable Income
What if your income varies significantly from month to month? You can still successfully automate savings monthly—you just need to be a bit more strategic. Here are two approaches:
Conservative Base Amount: Calculate your lowest-earning month from the past year and automate savings monthly based on that amount. For instance, if your income ranges from $2,500 to $5,500 monthly, and your lowest month was $2,500, you might automate $200 per month in savings. Then manually transfer additional amounts during higher-earning months.
Percentage-Based Automation: Some employers and banks allow you to split your direct deposit by percentage rather than dollar amount. You might direct 10% of every paycheck to automatically go to savings, no matter how much you earn. This way, you automate savings monthly proportionally to your income. When you earn $3,000, $300 goes to savings. When you earn $5,000, $500 goes to savings.
Learning how to automate savings monthly with variable income takes a bit more planning, but it’s absolutely possible and incredibly valuable for building financial security in unpredictable income situations.
Step 5: Create Multiple Automated Savings for Different Goals
Once you’ve mastered the basics of how to automate savings monthly, the next level is creating separate automated savings streams for different financial goals. This approach prevents the common problem of having one big savings pot and never being quite sure if you can afford to use some of it for a specific purpose.
The Power of Goal-Specific Automated Savings
When you automate savings monthly toward clearly defined goals, you create what financial psychologists call “mental accounts.” Your brain naturally starts thinking of that vacation fund money as completely separate from your emergency fund money. This mental separation makes you far less likely to raid your emergency fund for a vacation because you can see you already have a dedicated vacation fund growing automatically.
Here’s a real-world example of how to automate savings monthly across multiple goals. Jennifer earns $4,200 monthly after taxes and has decided to save $630 per month total (15% of her income). Rather than putting everything in one account, she learned how to automate savings monthly across four different goals:
| Savings Goal | Monthly Automated Amount | Target Amount | Time to Goal |
|---|---|---|---|
| Emergency Fund | $300 | $12,600 (3 months expenses) | 42 months |
| Annual Vacation | $150 | $1,800 | 12 months |
| Car Replacement | $130 | $7,800 | 60 months |
| Christmas/Gifts | $50 | $600 | 12 months |
By learning how to automate savings monthly for each specific goal, Jennifer never feels guilty about booking her annual vacation. She’s been automatically setting aside $150 every month specifically for that purpose. The money has a job, and she’s simply letting it do that job when she books the trip.
Prioritizing Your Automated Savings Goals
When you’re figuring out how to automate savings monthly across multiple goals, prioritization matters. Financial experts generally recommend this hierarchy:
- Emergency Fund First: Build at least $1,000, then work toward 3-6 months of expenses
- High-Interest Debt Payoff: Credit cards and other loans above 7-8% interest
- Retirement Contributions: Especially if your employer offers matching (that’s free money!)
- Medium-Term Goals: Car replacement, home down payment, education costs
- Short-Term Wants: Vacation, entertainment, hobby equipment
This doesn’t mean you can’t automate savings monthly for fun goals while also building your emergency fund. It just means allocating more money to the foundational goals first. You might send $250 monthly to emergency savings and $75 to vacation savings until your emergency fund is fully funded, then flip those amounts.
Using Savings Account “Buckets” for Multiple Goals
Many banks now offer “bucket” features that let you create multiple sub-accounts within one main savings account. Ally Bank calls them “Savings Buckets,” Marcus calls them “Savings Goals,” and Capital One 360 uses “Savings Goals” as well. These features are perfect for learning how to automate savings monthly toward different objectives without opening completely separate accounts.
The advantage of buckets is that all your money is still in one account earning the same high interest rate, but you can visually see how much is allocated to each goal. When you automate savings monthly using buckets, you typically set up one main recurring transfer to the account, then set up automatic internal allocations to each bucket. For example, your $600 monthly automated savings might automatically split as $300 to Emergency, $150 to Vacation, $100 to Car, and $50 to Gifts.
Understanding how to automate savings monthly with multiple goals transforms saving from a vague intention (“I should save money”) into a concrete strategy with clear milestones and visible progress.
Step 6: Gradually Increase Your Automated Monthly Savings
One of the most powerful aspects of learning how to automate savings monthly is that it’s not a “set it and forget it forever” system—it’s designed to grow with you. As your income increases or your expenses decrease, gradually increasing your automated savings is how you accelerate your journey to financial security.
The Annual Raise Strategy
The simplest method for increasing how much you automate savings monthly is to redirect at least half of every raise or promotion to savings. Most people experience “lifestyle inflation”—as they earn more, they spend more, and their savings rate stays flat. But when you automate savings monthly increases, you can break this cycle.
Here’s how it works: Sarah earns $50,000 annually and currently automates $300 monthly to savings. She receives a 4% raise, bringing her salary to $52,000—an extra $2,000 per year or roughly $167 per month after taxes. Instead of absorbing that entire amount into her regular spending, Sarah increases her automated monthly savings by $80 (about half the raise) to $380 per month.
Over five years, if Sarah receives 4% raises annually and consistently increases how much she automates savings monthly by half of each raise, she’d be saving over $550 per month by year five—while still enjoying gradually increasing spending money. This strategy of incrementally scaling how to automate savings monthly creates exponential growth in your savings without feeling like a sacrifice.
The “Savings Challenge” Approach
Another effective method for increasing automated savings is to challenge yourself with small, regular increases. When you’re comfortable with your current automated savings amount, try increasing it by just $25-50 monthly every quarter. This gradual approach to scaling how to automate savings monthly feels almost painless.
Consider Marcus, who started by learning how to automate savings monthly at just $100. Here’s how his quarterly increases looked:
- Quarter 1-3: $100 automated monthly
- Quarter 4-6: $125 automated monthly (25% increase)
- Quarter 7-9: $175 automated monthly (40% increase)
- Quarter 10-12: $225 automated monthly (29% increase)
- After one year: $250 automated monthly
By gradually learning how to automate savings monthly at higher amounts, Marcus went from saving $1,200 in his first year to being on track to save $3,000 in his second year—a 150% increase that happened so gradually he barely noticed the reduced spending money.
Windfall Automation Strategy
Windfalls—tax refunds, bonuses, gifts, or inheritance—present perfect opportunities to increase how much you automate savings monthly permanently. Rather than treating a $2,000 bonus as a one-time spending spree, use it strategically to boost your automated savings.
Here’s a smart approach: Take that $2,000 bonus and split it three ways. Put $700 toward something fun you want right now, save $800 as a lump sum in your emergency fund, and use the remaining $500 to cover five months of increased automated savings. Specifically, increase your automated monthly savings by $100, and that $500 covers the difference for five months. After those five months, you’re usually adjusted to the new amount and won’t even miss the extra $100.
This windfall strategy for increasing how to automate savings monthly gives you immediate gratification, a savings boost, and a permanent increase in your savings rate. It’s a win-win-win approach. For more strategies on maximizing unexpected income, check out this emergency fund guide that discusses smart allocation of windfalls.
The Expense Reduction Method
Sometimes increasing how to automate savings monthly doesn’t require earning more—it requires spending less. Every time you successfully reduce or eliminate an expense, immediately increase your automated savings by that amount. Canceled a $15 streaming service you weren’t using? Increase automated savings by $15. Refinanced your car loan and lowered your payment by $50? Increase automated savings by $50.
This approach to scaling how to automate savings monthly ensures that expense reductions actually improve your financial position rather than just freeing up money that gets absorbed into other spending. Your automated savings becomes your accountability partner, capturing every dollar you free up through smarter spending decisions.
Step 7: Monitor and Adjust Your Automated Savings Strategy
The final step in mastering how to automate savings monthly is establishing a regular review and adjustment process. While the beauty of automation is that it works without constant attention, checking in periodically ensures your system continues to align with your evolving financial situation and goals.
The Quarterly Financial Check-In
Set a recurring calendar reminder every three months to review how your automated savings are performing. This isn’t about obsessing over your accounts—it’s about ensuring the automation is still serving your needs. During your quarterly review of how to automate savings monthly, ask yourself these questions:
- Are the automated transfers happening consistently without issues?
- Have there been any overdrafts or problems with timing?
- Has my income changed in a way that warrants adjusting the amounts?
- Have I reached any savings goals that should be redirected?
- Are there new financial goals I should add to my automated savings?
- Am I earning competitive interest rates in my savings accounts?
This quarterly check-in on how to automate savings monthly takes about 15-20 minutes but can prevent problems and optimize your savings strategy. You might discover that you’ve reached your $10,000 emergency fund goal and can now redirect that $300 monthly automation toward your home down payment fund instead.
Dealing With Financial Emergencies and Automated Savings
What happens when you face a genuine financial emergency and need to temporarily pause or reduce how much you automate savings monthly? First, understand that this is completely normal and doesn’t represent failure. Life happens, and your automated savings system should be flexible enough to accommodate real challenges.
If you need to reduce or pause automated savings temporarily, follow this protocol:
- Assess if it’s truly necessary: Can you reduce other discretionary spending instead of touching automated savings?
- Make it temporary and specific: “I’m reducing automated savings from $300 to $100 for three months” is better than “I’m stopping savings indefinitely.”
- Set a calendar reminder: Mark the exact date when you’ll resume your normal automated savings amount.
- Document the reason: Write down why you reduced automated savings. This creates accountability and helps you learn for the future.
The key to successfully navigating disruptions in how to automate savings monthly is treating them as temporary adjustments, not permanent changes. Most people who pause automated savings “until things get better” never restart it. But those who set specific timeframes and reminders resume their savings within the planned period 87% of the time.
Tracking Your Progress and Celebrating Milestones
One of the most motivating aspects of learning how to automate savings monthly is watching your balances grow without effort. Make a habit of checking your savings accounts monthly—not to worry or stress, but to celebrate your progress. Many banks offer visual progress trackers that show how close you are to specific savings goals.
Consider creating your own savings milestone rewards. When you reach $1,000 in emergency savings through your automated monthly contributions, treat yourself to a nice dinner. When you hit $5,000, maybe a small splurge you’ve been wanting. These celebrations reinforce the positive habits you’ve built and make the journey of automated savings more enjoyable.
You might also track your “automated savings streaks”—how many consecutive months you’ve successfully automated savings without pausing or reducing. Some people find this gamification makes the process more engaging. “I’ve automated savings monthly for 18 consecutive months” becomes a point of pride and motivation to keep the streak